
How to:
Painting and Stenciling Adornments
When creating an ornate painted cake design, I’ll often start with a stencil for a base and then complete the details by hand, painting around what I’ve begun with the stencil. I find this helps not only to create balance within the placement but also balance within the design elements. Using a mixture of stenciling and hand painting creates fluidity within a fixed design.
TOOLS:
- vodka
- FDA-certified edible gold dust
- stencils
- fine-tipped paintbrushes
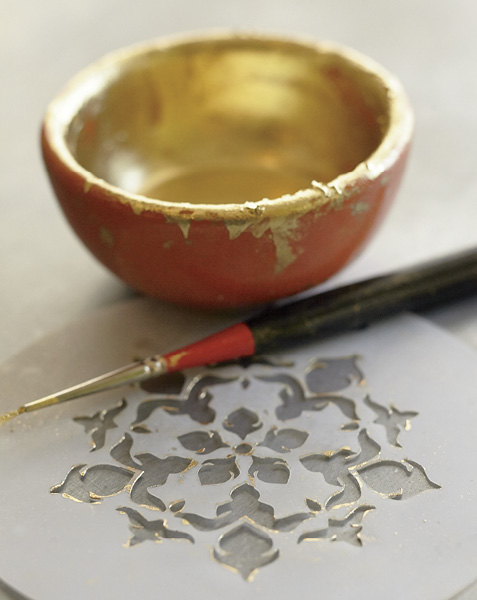
 In a small bowl, stir vodka into the
gold dust until any lumps dissipate and a paintable liquid forms.
You may need to add more liquid throughout the process if your
paint becomes too thick.
In a small bowl, stir vodka into the
gold dust until any lumps dissipate and a paintable liquid forms.
You may need to add more liquid throughout the process if your
paint becomes too thick.
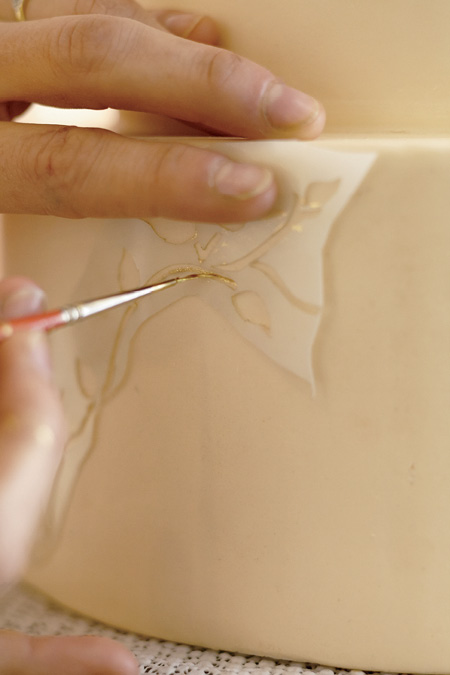
 Gently hold the stencil against the
cake. With the small brush, outline the shapes in the stencil,
making sure not to move the stencil as you’re working.
Gently hold the stencil against the
cake. With the small brush, outline the shapes in the stencil,
making sure not to move the stencil as you’re working.

 After you’ve painted stencil
patterns where you desire, use the fine paintbrush to paint
patterns and organic shapes freehand to fill in the spaces around
the stenciled patterns. When painting freely, start off with simple
lines and shapes. Then layer upon this until you’re satisfied with
the design. The paint will dry quickly.
After you’ve painted stencil
patterns where you desire, use the fine paintbrush to paint
patterns and organic shapes freehand to fill in the spaces around
the stenciled patterns. When painting freely, start off with simple
lines and shapes. Then layer upon this until you’re satisfied with
the design. The paint will dry quickly.