5 Flowing Text
Lesson Overview
In this lesson, you’ll learn how to do the following:
-
Import and flow text into existing text frames.
-
Resize text frames automatically.
-
Link text frames to flow text across columns and pages.
-
Create linked frames automatically.
-
Add pages and linked frames automatically while flowing text.
-
Apply paragraph styles to text.
-
Control column breaks.
-
Make a jump line to indicate where an article continues.

This lesson will take approximately 45 minutes to complete.
Please log in to your account on peachpit.com to download the lesson files for this chapter, or go to the “Getting Started” section at the beginning of this book and follow the instructions under “Accessing the Lesson Files and Web Edition.” Store the files on your computer in a convenient location.

Adobe InDesign provides methods for flowing text into existing frames, creating frames while flowing text, and adding frames and pages while flowing text. This makes it easy to flow copy for anything from a catalog to a magazine article to an ebook.
Getting started
In this lesson, you’ll work on a booklet in progress. The design of the opening spread of the article is almost finished, and several pages are ready for text. While working on this article, you will experiment with various text-flow methods and create a “jump line” to indicate the page on which an article continues.
 Note: If you have not already
down-loaded the project files for this lesson to your computer from
your Account page, make sure to do so now. See “Getting Started” at the beginning of the
book.
Note: If you have not already
down-loaded the project files for this lesson to your computer from
your Account page, make sure to do so now. See “Getting Started” at the beginning of the
book.
-
To ensure that the preferences and default settings of your Adobe InDesign program match those used in this lesson, move the InDesign Defaults file to a different folder following the procedure in “Saving and restoring the InDesign Defaults file” on pages 4–5.
-
Start Adobe InDesign.
-
The InDesign Start Screen displays. Click Open at left. (If the Start Screen does not display, choose File > Open from the InDesign menu bar.)
-
Open the 05_Start.indd file in the Lesson05 folder, located inside the Lessons folder within the InDesignCIB folder on your hard disk.
-
If the Missing Fonts dialog box displays, click Sync Fonts to access any missing fonts through Adobe Typekit. Click Close when font syncing is complete.
Note: For higher contrast in
the printed manual, the screen captures in this book show the
Medium Light interface. Interface elements such as panels and
dialog boxes may be darker on your screen. -
To ensure that the panels and menu commands match those used in this lesson, choose Window > Workspace > [Advanced], and then choose Window > Workspace > Reset Advanced.
-
To display the document at a higher resolution, choose View > Display Performance > High Quality Display (if it’s not already enabled).
-
Choose File > Save As, rename the file 05_FlowText.indd, and save it in the Lesson05 folder.
-
If you want to see what the finished document looks like, open the 05_End.indd file in the same folder. You can leave this document open to act as a guide as you work.

-
When you’re ready to resume working on the lesson document, display it by clicking its tab in the upper-left corner of the document window.
Flowing text into an existing frame
 Tip: InDesign provides many
features for automatically and manually controlling how text flows
through columns and frames. These include the paragraph Keep
Options (Keep With Previous, Keep With Next, and Keep Lines
Together), along with Column Break and Frame Break characters (Type
> Insert Break Character).
Tip: InDesign provides many
features for automatically and manually controlling how text flows
through columns and frames. These include the paragraph Keep
Options (Keep With Previous, Keep With Next, and Keep Lines
Together), along with Column Break and Frame Break characters (Type
> Insert Break Character).
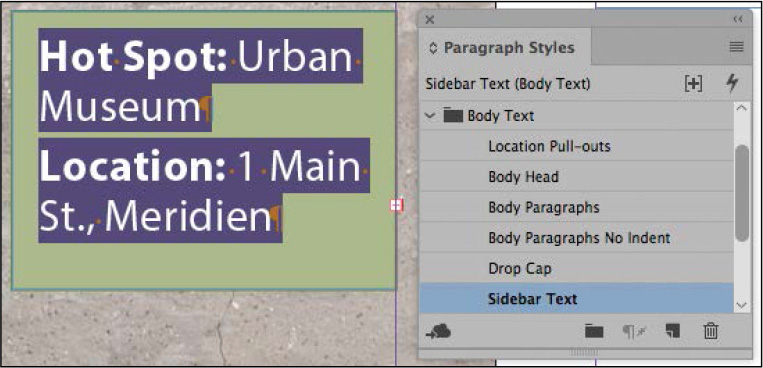
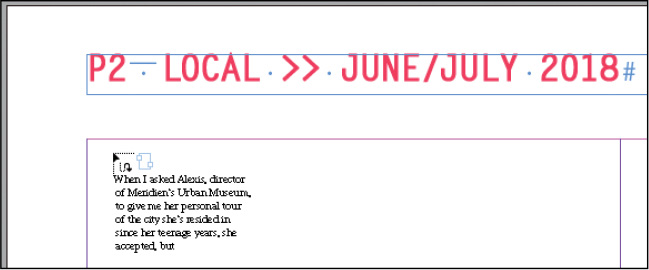
When you import text, you can flow it into a new frame or an existing frame. If the frame is empty, you can click the loaded text icon in the frame to flow the text. On the left page of the opening spread of this booklet, an empty sidebar box is ready for text to be inserted. You will import a Microsoft Word document into this frame, apply a paragraph style, and automatically adjust the height of the text frame.
Importing text into an existing text frame
-
Choose Type > Show Hidden Characters to see paragraph returns, spaces, tabs, and other hidden characters onscreen. This helps you place and format text.
-
Zoom in to comfortably view the sidebar text frame on the left page of the opening spread. The frame has a stroke and a sage green background.
-
Make sure no objects are selected.
Tip: You edit text with the
Type tool and thread (link) text frames with the Selection tool,
but it does not matter what tool is selected when you import
text. -
Choose File > Place. At the bottom of the Place dialog box, make sure the three options are deselected: Show Import Options, Replace Selected Item, and Create Static Captions. (If necessary, click Options on macOS to see the options.)
-
Locate 05_MuseumStats.docx, in the Lesson05 folder, and then double-click it.
The pointer becomes a loaded text icon (
 ),
previewing the first few lines of text in the article you are
placing. When you move the loaded text icon over an empty text
frame, parentheses enclose the icon (
),
previewing the first few lines of text in the article you are
placing. When you move the loaded text icon over an empty text
frame, parentheses enclose the icon ( ).
). -
Position the loaded text icon over the placeholder text frame.

-
Click to place the text.
-
Choose File > Save.
The text does not fit in the text frame and is considered “overset.” Overset text is indicated by a red plus sign (+) in the out port, which is in the lower-right corner of the text frame. You will resolve the overset text later in this exercise.
Applying a paragraph style
Now you will apply a paragraph style to the sidebar text. The paragraph style includes a nested style that automatically applies bold to the beginning of a paragraph until InDesign encounters the first colon.
-
Using the Type tool (
 ), click in the sidebar
text frame so you can format the text. Choose Edit > Select All
to select all the text in the frame.
), click in the sidebar
text frame so you can format the text. Choose Edit > Select All
to select all the text in the frame. -
Choose Type > Paragraph Styles to open the Paragraph Styles panel.
Tip: Style groups help you
organize styles in panels such as the Paragraph Styles and Swatches
panels. When the group is expanded, you can select options in the
group. -
Click the triangle to the left of the Body Text style group to open it.
-
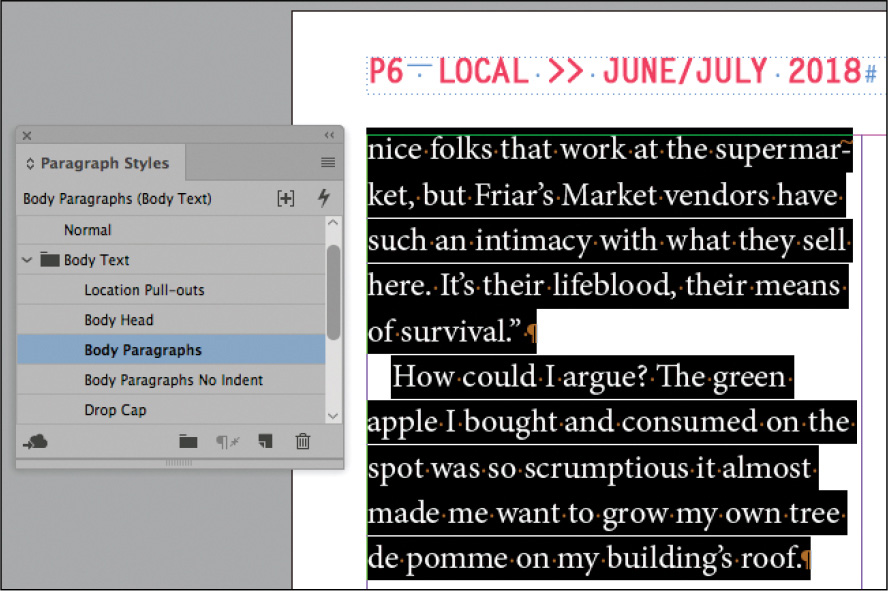
Click the paragraph style Sidebar Text.
-
Click in the text to deselect it. Choose File > Save.
After formatting, the text is still overset, so you will resolve that in the next exercise.
Resizing text frames automatically
While adding, deleting, and editing text, you often end up resizing text frames. With the Auto-Size feature, you can specify that a text frame resize itself automatically according to your specifications. You will now use the Auto-Size feature to automatically adjust the size of the sidebar text frame based on the length of the text.
Tip: The Auto-Size feature is
ideal for individual text frames with a stroke and/or fill
providing a boundary for the text (for example, a sidebar or
coupon). If the text is shortened, the frame becomes smaller as
well. If the text is lengthened, the frame bcomes bigger so text is
not overset.
-
Using the Selection tool (
 ), click the text frame
containing the sidebar text starting with “Hot Spot.”
), click the text frame
containing the sidebar text starting with “Hot Spot.” -
Choose Object > Text Frame Options. In the Text Frame Options dialog box, click the Auto-Size tab.
-
Choose Height Only from the Auto-Sizing menu.
-
If necessary, click the center icon in the top row (
 )
to indicate that you want the text frame to “grow down” as if you
were manually dragging the bottom handle of the text frame
down.
)
to indicate that you want the text frame to “grow down” as if you
were manually dragging the bottom handle of the text frame
down.
-
Click OK.
-
Click the pasteboard to deselect objects on the page, and then choose View > Screen Mode > Preview to see how the sidebar looks.

-
Choose View > Screen Mode > Normal to restore the layout aids, such as guides and hidden characters.
-
Choose File > Save.
Flowing text manually
Tip: You can create columns by
threading individual text frames or by dividing text frames into
multiple columns using the General tab of the Text Frame Options
dialog box (Object menu). Some designers prefer separate text
frames for more layout flexibility.
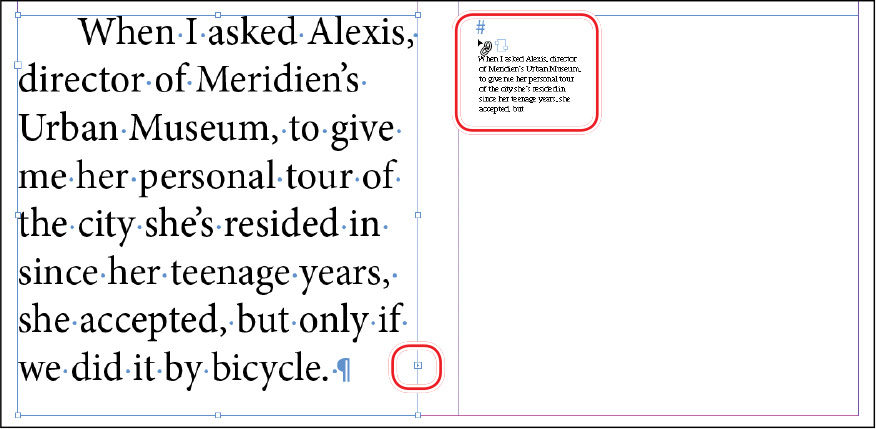
The process of taking an imported text file and flowing it across several connected text frames is called threading text. InDesign lets you flow text manually for greater control, flow text automatically to save time, and flow text while automatically adding enough pages to hold all the text.
In this exercise, you will flow the feature article text into the two columns at the bottom of the right page. First, you will select a Word file to import into the existing text frame in the first column. Second, you will thread the first text frame to the second text frame. Finally, you will create new text frames on the third page of the document to contain more text.
-
Choose View > Fit Spread In Window to locate the two text frames at the bottom of the right page under the sentence ending with “deterrent.”
-
Zoom in as necessary to view these text frames.
Tip: To prepare to import
text, you can pre-thread empty text frames. Using the Selection
tool, click a frame’s out port, and then click anywhere in the next
frame. Repeat this process until all the frames are threaded. -
Using the Type tool (
), click in the text frame
at the left as shown below.
-
Choose File > Place.
-
Locate and select 05_Feature_2018.docx, in the Lesson05 folder.
-
Select Replace Selected Item at the bottom of the Place dialog box. (If necessary, click Options on macOS to see this option.) Click Open.

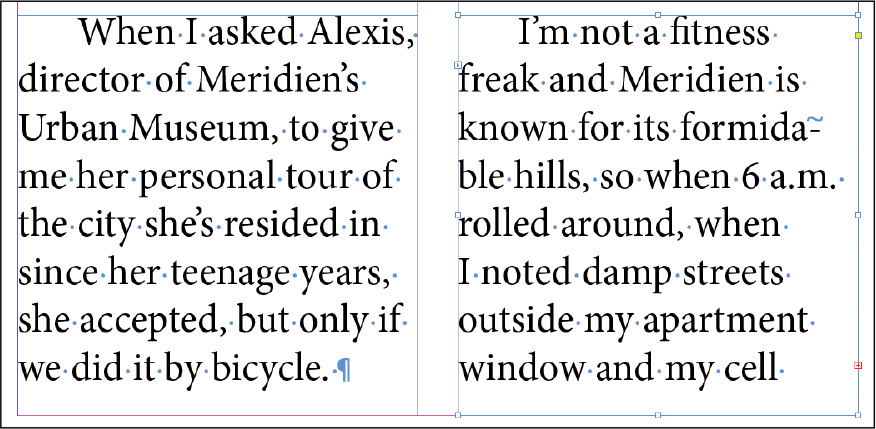
The text flows into the existing frame in the left column. Notice that the text frame includes an out port in the lower-right corner. The red plus sign (+) indicates that some of the text you imported is overset, meaning that not all of the text fits into the existing text frame. You will now flow the additional text into another text frame in the second column.
Tip: As you flow text, the
Selection tool’s cursor changes to various loaded text icons. -
Using the Selection tool (
), click in the text
frame’s out port to load the text icon. (If necessary, first click
the frame to select it, and then click the out port.) -
Move the loaded cursor over the text frame to the right and click once in the frame as shown.
 Tip: If you change your mind
and decide you don’t want to flow overset text, you can press Esc
or click any tool in the Tools panel to cancel the loaded text
icon. No text will be deleted.
Tip: If you change your mind
and decide you don’t want to flow overset text, you can press Esc
or click any tool in the Tools panel to cancel the loaded text
icon. No text will be deleted. -
The text flows into the second column. The out port in the text frame at the right contains a red plus sign (+), indicating that there is still overset text.
-
Choose File > Save. Leave the page in this position for the next exercise.
Tip: You can also “load” the
Type tool with graphics files and text files at the same time.
Creating text frames while flowing text
Tip: The loaded text icon
changes slightly in appearance, depending on whether you are
threading text manually or using semi-autoflow or autoflow.
Now, you will try two different text flow methods. First, you will use semi-autoflow to place text into a column. Semi-autoflow lets you create threaded text frames one at a time. The pointer becomes a loaded text icon that automatically reloads after each column of text is placed. After that, you will use the loaded text icon to manually create a text frame.
Note that the success of these exercises relies on holding the correct modifier keys on the keyboard and clicking in the correct place. Therefore, it may help to read all the steps in each exercise before you perform them. If anything goes wrong, be sure to choose Edit > Undo, and then repeat the step.
Note: The success of these
exercises relies on holding the correct modifier keys on the
keyboard and clicking in the correct place. Therefore, it may help
to read all the steps in each exercise before you perform them. If
anything goes wrong, be sure to choose Edit > Undo, and then
repeat the step.
-
Using the Selection tool (
), click the out port of
the text frame in the second column on the right page (page 1).
This loads the text icon with the overset text.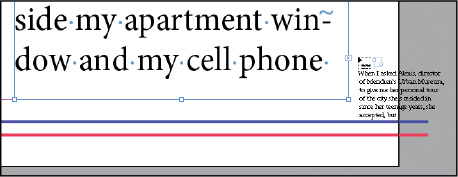
You will create new text frames on page 2 to contain more of the text. Guides indicate where to place the text frames.
-
Choose Layout > Next Spread to display pages 2 and 3, and then choose View > Fit Spread In Window.
When the loaded text icon is active, you can still navigate to different document pages or add new pages.
-
On the page at left, position the loaded text icon (
)
in the upper-left corner where the guides intersect. For proper
placement, watch for the black arrow in the loaded text icon to
turn white. Tip: When the loaded text icon
is over an empty text frame, a chain icon indicates that you can
thread to that frame. You can also flow overset text into an empty
graphics frame; the graphics frame is automatically converted to a
text frame. -
Hold down the Alt (Windows) or Option (macOS) key and click.
The text flows into the first column. Because you held down Alt or Option, the pointer is still a loaded text icon, ready for you to flow text into another frame.
-
Release the Alt or Option key, and position the loaded text icon (
) in the second column indicated by the
guides. Tip: When you create a text
frame by clicking with the loaded text icon, InDesign creates the
new text frame as wide as the column where you click. Although
these frames are placed within the column guides, you can move,
resize, and reshape these text frames as necessary. -
Click to create a frame within the column guides in the right column.

Clicking the loaded text icon creates text frames within the column guides and flows the text.
Text remains overset, as indicated by the red plus sign (+) in the lower-right corner of the second text frame. You will fix this later.
-
Choose File > Save. Leave the page in this position for the next exercise.
Creating threaded frames automatically
To speed up the creation of column-width linked text frames, InDesign provides a shortcut. If you press the right arrow key as you drag the Type tool to create a new text frame, InDesign automatically divides the text frame into multiple threaded frames. For example, if you press the right arrow key once while creating a text frame, the text frame is divided into two text frames of equal width. If you press the right arrow key five times, the text frame is divided five times, resulting in six columns of equal width.
You will now create a two-column text frame on page 3. You can then thread the text frames to help contain the overset text.
-
Choose View > Fit Spread In Window to center pages 2 and 3 in the window.
-
Select the Type tool (
), and position it in the
first column on the page at right, where the column guide (purple)
and margin guide (pink) intersect. Note: If you accidentally
press the right arrow key more than once—producing more than two
threaded text frames—choose Edit > Undo, and then try again. You
can also remove text frames by pressing the left arrow key as you
drag. -
Drag the Type tool down and to the right to create a text frame that spans the width of both columns. As you drag, tap the right arrow key once.
InDesign automatically subdivides the text frame into two threaded text frames of equal width.
-
Continue to drag down to position the text frame within the column and margin guides. If necessary, use the Selection tool (
) to adjust the text frames to fit within the
guides as shown.
-
Using the Selection tool, click the text frame in the second column on page 2. Click the frame’s out port in the lower-right corner to load the text icon with overset text.
-
Click the loaded text icon (
) in the new text
frame on page 3.The text flows through the two columns.

-
Choose File > Save. Leave the page in this position for the next exercise.
Flowing text automatically
You will now autoflow the remaining text into the booklet. When you autoflow text, InDesign automatically creates new text frames within column guides on subsequent pages until all of the overset text is placed. This is ideal for longer projects, such as books, but for this project it will end up obscuring some of the images that are already placed. You can fix that easily by deleting the text frames; the text flow is automatically rerouted through the remaining frames in the thread.
-
Using the Selection tool (
), click the out port in
the lower-right corner of the text frame in the second column on
page 3. This loads the text icon with the overset text. (If
necessary, first click the frame to select it, and then click the
out port.) -
Choose Layout > Next Spread to display pages 4 and 5.
-
Position the loaded text icon (
) in the first
column on page 4, precisely where the column and margin guides
intersect. Tip: Shift-clicking the loaded
text icon creates and flows text into automatically created text
frames, adding pages as necessary to flow all the text into the
document. -
Hold down the Shift key and click.
Notice that new text frames are added to the remaining pages in the document, even on top of the photos. This is because you held down the Shift key to autoflow text.

-
Using the Selection tool, Shift-click to select the two new text frames added to page 5 (the frame on top of the image of the man riding a bike).
-
Choose Edit > Clear to delete the text frames.
-
Choose Layout > Next Spread to display pages 6 and 7. As you can see, the text is flowing from page 4 to page 6 to page 7.
-
Using the Selection tool, Shift-click the two new text frames added to page 7 (the frames on top of the image of the rental bikes).
-
Choose Edit > Clear to delete the text frame.
Text is still overset, but you will resolve that with formatting in the next exercise.
-
Choose File > Save. Leave the page in this position for the next exercise.
Applying paragraph styles to text
Now that all the threaded text frames are in place and the text is flowing through them, you can format the text. This gives you a clear view of how the text fits and how it looks with the layout. Here, you will format the entire article with the Body Paragraphs style, and then you will format the opening paragraph and subheads.
-
Using the Type tool (
), click in any text frame
containing the main article you just imported. -
Choose Edit > Select All to select all the text in the story (the text in the series of linked frames).
-
Choose Type > Paragraph Styles to open the Paragraph Styles panel.
-
Click the paragraph style Body Paragraphs. (If necessary, open the Body Text style group folder and scroll to locate the style.)
-
Choose Layout > Go to Page. Enter 1 in the Page field, and click OK.
-
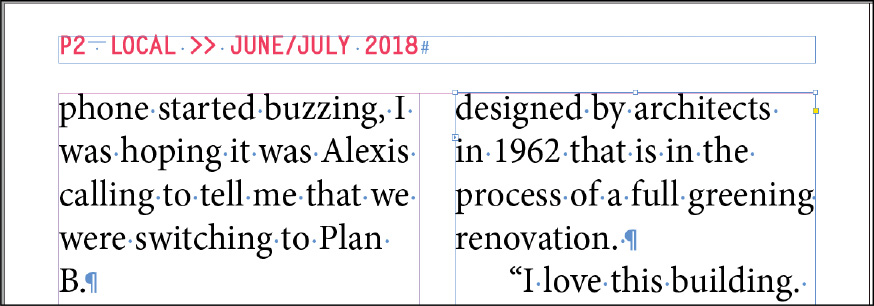
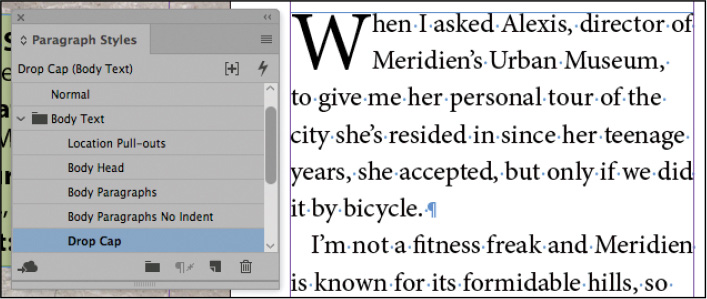
On page 1, click in the first paragraph of the article, starting with “When I asked Alexis.”
-
Click the Drop Cap paragraph style in the Paragraph Styles panel.
Now you will format the three subheads in the article.
-
Choose View > Fit Spread In Window, and then choose Layout > Next Spread to view pages 2 and 3.
-
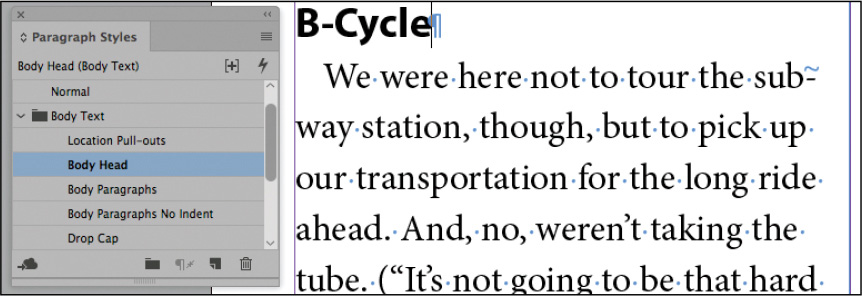
Using the Type tool, click in the subhead that reads “B-Cycle” in the left column of page 2. This targets the paragraph for paragraph formatting.
-
Click the Body Head paragraph style in the Paragraph Styles panel.
-
Follow steps 9–10 to apply the Body Head paragraph style to the remaining subheads in the story as follows:
-
Page 3, left column: “Old Town”
-
Page 3, right column: “Cobblestones, Gentrification and Local Produce”
-
Page 4: “Farmers Market”
-
-
Choose File > Save. Remain on this page for the next exercise.
Adjusting columns
InDesign provides many methods for adjusting the length of columns of text. You might do this to suit the layout or to keep specific topics together. One way to do this is to resize the text frame with the Selection tool. Another method is to manually “bump” text to the next column with the Column Break character. Here, you will adjust the size of the text frames to suit the layout.
-
Double-click the page 4 icon on the Pages panel to center it in the document window.
-
Using the Selection tool (
), click the text frame on
the left containing the main article. Note: If necessary, type
2.1 in in the Height field on the Control panel
and press Enter (Windows) or Return (macOS) to resize the
frame. -
Drag the bottom of the text frame up so that the height of the frame shows approximately 2.1 in.
-
Select the text frame at right, which contains the second column of text. Drag the bottom of the frame up to match the height of the text frame at left.
Resizing these text frames keeps the article text from obscuring the shaded sidebar box.
 Tip: To adjust how text flows
within frames, you can enter break characters such as Column Break
and Frame Break (Type > Insert Break Character).
Tip: To adjust how text flows
within frames, you can enter break characters such as Column Break
and Frame Break (Type > Insert Break Character). -
Choose Layout > Next Spread to see pages 6 and 7. The “Farmers Market” subhead is now at the top of page 6.
-
Using the Selection tool, click the text frame at left. Drag the bottom of the text frame up so the height of the frame shows 2.1 in.
-
Click the pasteboard to deselect all objects on the page, and choose File > Save.
Adding a jump line page number
When an article continues across multiple pages, forcing readers to turn pages, it helps to add a jump line, such as “(Continued on page x).” You can create jump lines in InDesign that automatically reflect the number of the next page in the text flow (that is, the next page to which the text frame is linked).
-
Double-click the page 1 icon in the Pages panel to center the page in the document window. Scroll to the right to view a portion of the pasteboard. Zoom in as necessary to see the text.
-
Using the Type tool (
) and working on the
pasteboard, drag to create a text frame approximately 1.5 inches by
0.25 inches. -
Using the Selection tool (
), drag the new text frame
to the bottom of the second column on page 1. Be sure the top of
the new text frame touches the bottom of the existing text
frame.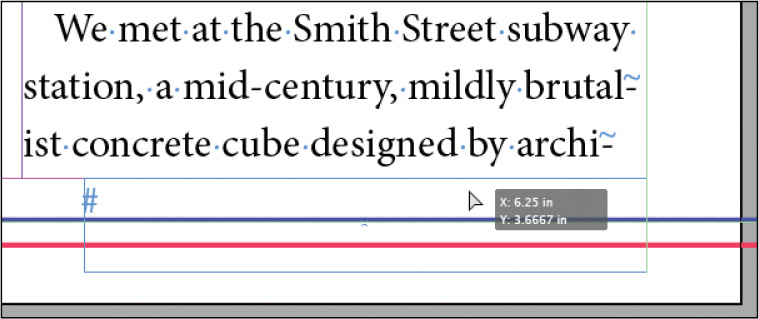
-
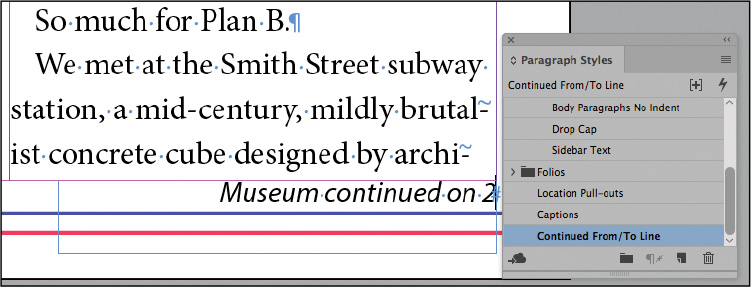
Using the Type tool, click to place an insertion point in the new frame. Type Museum continued on followed by a space.
Note: For the Next Page
Number character to work properly, the text frame containing the
jump line must touch or overlap the threaded frame. -
Right-click (Windows) or Control-click (macOS) to display a context menu, and then choose Insert Special Character > Markers > Next Page Number. The jump line now reads “Museum continued on 2.”

-
Choose Type > Paragraph Styles to open the Paragraph Styles panel. With the text insertion point still in the jump line, click the Continued From/To Line paragraph style to format the text according to the template.
-
Choose File > Save.
-
Choose View > Fit Spread In Window.
-
Choose Preview from the Screen Mode menu in the Application bar at the top of the screen.
Congratulations, you have finished the lesson.
Exploring on your own
Tip: Experiment with
text-flowing options to find out what threading methods work best
for you and your projects. For example, if you are creating a
template for a catalog, you might thread several small text frames
for item descriptions and then flow the text later.
In this lesson, you learned how to create a jump line that indicates the page number on which an article continues. You can also create a jump line that indicates the page number from which a continued article originated.
-
Choose View > Screen Mode > Normal to see the frame edges.
-
Using the Selection tool (
), duplicate the text frame
containing the jump line on page 1. (To duplicate an object, select
it and choose Edit > Copy.) -
Paste the jump line text frame on page 2. Drag the text frame so that it touches the top of the text frame in the first column. (Drag the top of the main text frame down as necessary so the jump line isn't touching the page header.)
-
Using the Type tool (
), change the words in the
text frame from “Museum continued on” to “Museum continued
from.” -
Select the page number, 3, in the jump line.
At this point, you need to replace the Next Page Number character with the Previous Page Number character.
-
Choose Type > Insert Special Character > Markers > Previous Page Number.
The jump line now reads “Museum continued from 2.”