Chapter 22
Trimming, Deadheading, and Closing Up Shop
In This Chapter
• Your pruning toolkit
• What to cut and when
• Putting your garden to bed
• The benefits of planting “green manure”
Previous chapters have covered nearly everything you need to know about plotting and planning your garden, deciding what to plant, planting, weeding and watering, and feeding. You’ve put a lot of work into your garden, but you’re not done yet.
In the next few pages, we look at the ways you can keep your plants healthy and productive by trimming and deadheading, with some specific information on how to trim herbs to maximize their potential. You also learn a little about dividing plants to multiply them. And finally, we go through the steps for putting your garden to bed for the winter.
Pick a Pruning Tool
Some gardeners get funny about tools. They may have a shed full of them, but they reach for the same two or three every time. You don’t need a big selection of pruning tools, but a couple basic items are essential, including a versatile hand pruning tool and some small snips.
Basic Pruners
The pruner, held in one hand, is used for cutting plant material up to about ½ inch in diameter.
Most hand pruners have metal blades and some sort of plastic-coated handles. A few have foam-covered or molded handles that have a comfortable feel. Blades can be chrome-plated steel, stainless steel, Teflon-coated steel, or carbon steel. The cutting mechanism is either a scissors action where a thin blade cuts against a thicker blade, or an anvil cut where a sharp upper blade cuts against a broad, flat blade.

Prof. Price’s Pointers
Pruning is the cutting back of plant material to remove dead, diseased, or damaged parts; to alter the shape of the plant; to encourage new growth; and to improve the quality or quantity of the fruit or flowers.
My favorite pruners are the Felco #7 bypass style with anvil blade, spring action, and signature bright red rotating handle. I’ve owned several pairs over the past 30 years (they don’t wear out; I just lose them), and I’ve never found a style of hand pruners I like better. A few years ago, I gave Prof. Price a pair, and he enjoys using them, too. What makes the #7s different is the way the rotating handle swivels in your hand—it’s very comfortable and easy on the muscles, which is especially helpful when you have a lot of pruning to do.
Garden Snips
Garden snips are handy tools to have around for all kinds of garden tasks. You can use them to harvest herbs and vegetables that are cut from their stems (eggplants, peppers, okra, some squash, and so on). You can also use them to trim out dead or diseased herbaceous (as opposed to woody) plant material. And once in a while, you’ll probably need them to cut twine or open a bag of mulch (but don’t do that too often because it will dull the blade).
You’ll find lots of different garden snips on the market. I have a pair that were a birthday gift 15 years ago, and I use them almost daily during the gardening season. (I also sometimes use them when I can’t find my kitchen scissors, but don’t tell my family that—they’d think that’s disgusting.)

Garden Guru Says
Keep all your pruning tools well sharpened so they deliver a clean, smooth cut every time. And if you have any suspicion that a plant you’re pruning is infected with disease, between every cut, wipe the blades clean with gauze soaked in alcohol.
Herbs All Year
If you’ve already had some experience with growing herbs, you know how easy they are to care for. And if you’ve been using your fresh herbs in your cooking, you’ll not want to give them up. Isn’t it nice to know that you can keep many of your herbs going all year long, even if you live in a cold climate?
Herbs are relatively easy to bring indoors when the summer growing season is over. And although they might not grow as well as they did outside, you could still have enough to harvest throughout the winter until it’s time to take them outdoors again.
These are the best herbs for growing indoors:
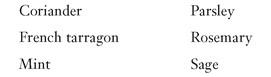
From Outdoors In
In Chapter 16, we learned about growing herbs. But keep in mind that when you bring plants in from the garden, you’ll have to acclimate them to the changes in temperature, light, and most importantly, humidity. Our homes tend to be a lot less humid than the great outdoors, and this can cause major stress on plants. Use a mister to make the plants feel at home.
It’s a good idea to use fresh potting soil when you bring plants indoors. Never bring in soil from the garden; that’s just asking for trouble. And be sure to inspect the plants for insects. Even if you don’t see any, they might be there. One way to deal with that possibility is to spray the plants with an insecticidal soap before bringing them in.
You can suffocate insects on outdoor plants that are making the transition to indoors by putting the plants in a plastic bag, closing it with a twist tie, and putting the bagged plant inside another sealed plastic bag. Leave the shrouded plant in the bags for a few days. The plant must be dry when you do this, or it can rot. But the lack of oxygen might be enough to kill any lingering insects.
Pruning and Trimming Herbs
Herbs are pretty easygoing when it comes to keeping trim. Only the perennials need pruning, but some of the annuals require an occasional “haircut” to prevent them from going to seed or to help renew growth.
When the weather gets hot and the plants have been around for a while, some herbs are tempted to put out flowers. With most herbs, that’s not a good thing. With all the energy plants need to produce flowers, there’s less left for the leaves, and that’s where the flavor typically is. Herbs may become bitter after they’ve flowered and their leaf production slows down.
With herbs such as basil, dill, mint, coriander, fennel, and most others, pinch out the flower buds as they appear. Simply squeeze the bud gently, just where it meets the stem, between your thumb and index finger and break it off with your fingernails.
If you have a lot of herbs growing in your garden, staying on top of this task takes some diligence.
Food for Thought
You might want to allow some herb flowers to bloom because they’re attractive or even edible. Chives, rosemary, dill (to add to dill pickle jars as a garnish), nasturtiums (not technically an herb, but often grown with herbs), and chamomile are a few. And if you want to collect herb seeds, allow some of your herbs to go to seed so you have them to collect.
If your herb plants get really scraggly looking, go after them with your pruners. (You should do this anyway with your perennial herbs to keep them thick and compact.) Just cut away, even up to half the plant. Do your cutting in the late afternoon when the sun isn’t so strong, and give them a good watering after. But don’t do heavy pruning within a month or so of an expected frost. The new growth will be especially tender and the cold will most likely kill it.
Annual herbs can be cut back drastically, especially those that had an early start. Just don’t expect them to grow back quickly. Allow a few weeks or even a month for them to grow enough foliage to start harvesting again.
The Best and the Brightest Veggies
When I was a young child, Prof. Price grew tomato plants in his garden at our home in New Jersey. I have a particular memory from that time of watching him pick the flowers off the tomatoes. When I asked him why he was doing that he patiently explained to me that it would make the plants produce bigger, better tomatoes.
Many fruiting annuals can benefit from the removal of some of the flower buds so more of the plant’s energy can go into the remaining flowers and, thus, into the fruit. Try this not only with tomatoes, but also peppers, eggplants, cucumbers, melons, pumpkins, and squash. (By the way, this is one of the tricks some gardeners use to win the blue ribbon for the biggest tomato or pumpkin at the county fair.)

Prof. Price’s Pointers
Seeds and fruits have the highest priority for a plant’s resources. That’s why the leaves of heavily fruited plants can sometimes look half-dead. Removing some of the flower buds, blooms, or very young fruits can help divert more goodies to the remaining fruits.
Deadheading
No, this has nothing to do with the Grateful Dead! Deadheading is the practice of removing dead blooms from plants. Most deadheading is done on ornamental flowering annuals and perennials and shrubs to encourage future bloom production. But some deadheading is appropriate for vegetable plants.
You should do this if the plant flowers but you don’t want it to produce fruit or seeds. Use the same technique as you do for pinching out unwanted blooms described earlier.
Take Out Your Dead
Death is an inevitable part of the life cycle. With many, if not most gardens, death comes every year. You sow your annual plants, they grow, they reproduce, and they die. So what do you do with all those dead plants?
After the first heavy frost, just about all the leaves and stems of herbaceous plants will have curled up and died. The annual plants will be dead, and the perennials will go into dormancy. You should clean up all the dead plant material (unless you plan to do a tilling; see the next section), and get rid of it. The debris from healthy plants can go on the compost pile. Any with obvious disease problems should be disposed of.
If you have some late-harvest plants like turnips or kale, just clean up around them.

Compost Pile
It might be tempting to just walk away from the dead garden after a long season of working in it, but resist that temptation. Old plant material is a disease and infestation habitat waiting to happen. By maintaining good garden hygiene, even after the growing season, you’ll be better able to avoid using harsh pesticides and herbicides in the future.
Not Dead; Just Asleep
Pulling up all the dead plants is the shortened version of the process of “putting the garden to bed” for the winter. Fastidious gardeners will do more.
For some gardeners, this extra work prolongs the time they get to spend in the garden. For others, it prolongs the time they have to spend in their garden. Either way, the more you do at the end of the season, the less you have to do at the beginning of the next gardening season.
Tilling and Fertilizing Encores
If you have the time and the inclination, you might want to give your garden a good tilling before you close it up for the winter. If you do plan to till, you won’t have to pull out dead plants; you’ll simply till them under. Just be sure to remove any diseased plants and dispose of them safely.
Before you till, you might think about adding a truckload or two of manure. When you fertilized earlier in the growing season, you used well-rotted manure, but this time you can use fresh manure because you’re putting it on an unplanted bed where it can’t burn tender plant parts.
Bedding Down Perennials
If your garden is in a colder zone, you might want to invest a little time in mulching the perennials. Strawberries, asparagus, and especially artichokes might need that extra protection.
For berries, use straw or wood chips 3 to 6 inches deep. Add this after the first hard frost.
Bed down asparagus with straw, wood shavings, compost, or leaf mold about 4 inches deep. Add the mulch after the first hard frost.
Artichokes do best with straw, leaves, or plastic mulch about 4 inches deep. Add the mulch before a frost. Artichokes won’t survive long, cold winters; this protection is for marginal areas that sometimes experience a cold snap.
The Great Cover Up
Now that you have a beautifully retilled garden bed with nothing in it, why not plant a special crop of plants called a cover crop that will work to improve the soil while you do nothing at all (well, almost nothing)?
Cover crops, which are sometimes called green manure, help reduce soil compaction by loosening heavy soils at the root zone, reduce the leaching of nitrogen and other nutrients during winter rains, and, when tilled under, add organic matter to the soil. Legume cover crops add nitrogen to the soil because they fix nitrogen in their roots.
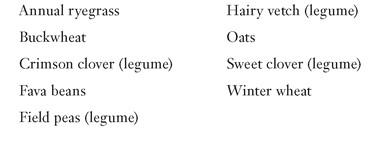
Some of the plants used for cover crops include the following:
Most cover crops are planted in the late summer or early fall, although in parts of California this can be done as late as early December. For more information on how to sow your own cover crop, visit these websites:
www.gardening.cornell.edu/factsheets/ecogardening/impsoilcov.html
casfs.ucsc.edu/publications/gardenideas/cover_crops.pdf
hgic.clemson.edu/factsheets/HGIC1252
The Least You Need to Know
• Keep your pruning tools sharpened and clean.
• Disinfect pruning tools between cuts if you suspect your plants are diseased or infested.
• Pinch back flowers on herb plants to keep them going in hot weather.
• Use mulch to protect artichokes, asparagus, and strawberries in cold weather.
• Plant a legume cover crop to reduce soil compaction, protect loss of nutrients from runoff, and to help return nitrogen to the soil.