Chapter 15
Back to Your Roots
In This Chapter
• Growing spuds
• Digging in to sweet potatoes and yams
• The real dirt on rutabagas, turnips, beets, and parsnips
• The original rabbit food: carrots
• Introducing onions and their relatives
In this chapter, it’s time to get back to our roots and learn all about root vegetables. These are, for the most part, the solid, basic starch vegetables that play such a big part in our images of old-fashioned holiday dinners. Think Thanksgiving and potatoes, turnips, rutabagas, parsnips, beets, carrots, sweet potatoes, and onions. They’re all here. All that’s missing is the turkey.
Super Spuds
Potatoes (Solanum tuberosum) are an ancient food, dating back thousands of years to their roots, if you will, with the Incas in Peru around 200 B.C.E. From there they traveled with the Spanish conquistadors back to Europe in the fifteenth century.
Potatoes have become the world’s largest food crop, beating out rice and corn (at least according to a potato trade association). The United States produces 35 billion pounds of potatoes every year, and we eat them in prodigious quantities.
Potatoes are classified in a number of ways based on their size, skin color, flesh color, harvest time, starch level, use, and shape. Some of the descriptions include the following:
• Early, second-early, and main crop
• Round, long, oval, and oblong
• Yellow and white flesh
• Thin and thick skin
• White, red, russet, brown, pink, yellow, blue, and purple skin
• High, medium, and low starch
• Baking, chip, french fry, mashing, and all-purpose
You might want to grow several different kinds, especially the unusual varieties that are so expensive to buy in stores.
Compost Pile
Planting your potato patch in the same part of the garden each year can introduce or spread diseases or pests. If you can, move it around from year to year.
Home gardeners generally start their spuds from seed potatoes, which are very small tubers with several eyes on each one. Be sure to buy only certified seed potatoes. You can use potatoes from your pantry that have grown some eyes, but if it’s sickly looking, toss it.
Get seed potatoes ready to sprout by warming them up a bit and exposing them to sunlight for a few days. A bright window in a warm part of the house will do.
Plant potatoes in the spring when the soil has warmed to about 45 degrees Fahrenheit or just before the last predicted frost. But if tender young plants have appeared and a heavy frost is predicted, be prepared to run out with newspapers, blankets, row covers, or straw to protect them. Otherwise, they won’t stand up to a heavy frost.
Give your potatoes a well-drained, well-cultivated bed with loamy soil, rich with organic matter. Potatoes like a pH of 5.8 to 6.5, but they’ll tolerate anywhere from 4.7 to 7.0.
You can grow potatoes in mounds or in rows. If you choose rows, make a furrow about 4 inches wide and 6 inches deep. Cut the seed potatoes into 1½-inch chunks with at least one eye per chunk, and plant them spaced according to the size of the potato you plan to harvest. For example, if you want full-size potatoes, plant the seeds 10 to 15 inches apart. If you’re planning on harvesting a lot of baby potatoes, place them every 4 inches.
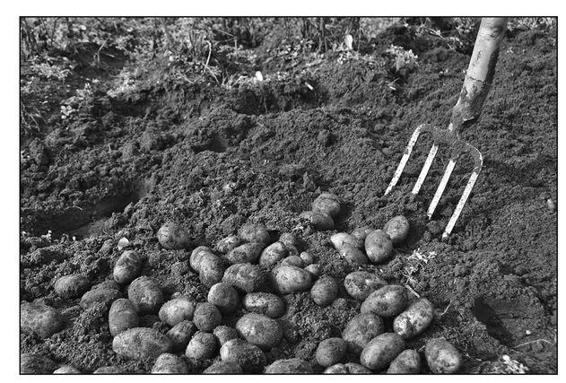
You can easily harvest potatoes grown in mounds or furrows with a garden fork.
©iStockphoto.com/ArkadySlavsky
Put the seed potatoes cut side down in the hole and fill it ½ full with soil. When you see little plants push through the soil, add more soil. Keep doing this as the plant grows, but don’t cover the foliage after it develops. Just keep adding soil to cover the stem. Potatoes grow just under the soil, but they should never be exposed to the sun. (Young potatoes exposed to too much sunlight will turn green. A toxic substance, causes the color change and makes them inedible, so toss them on the compost pile.) The continual soil additions as the spuds grow help avoid sun exposure.
Give the potatoes a regular, thorough watering, but never allow the soil to become soggy or you’ll wind up with rotten potatoes.
Food for Thought
Grow potatoes in old tires? Sure! Simply add a tire on top of the first potato as you mound the soil over the stem. Or you can grow potatoes in double-thick, black plastic garbage bags. Just punch a few holes for drainage.
They’ll manage better with too little water than with too much. As for feeding, give them a low-nitrogen fertilizer so they don’t put too much energy into their leaves.
You can harvest your potatoes by hand, a few at a time, beginning about 2 or 3 weeks after the flowers have fallen off. The remaining potatoes will continue to grow, and by picking the larger ones from each plant, you can encourage the plants to produce more tubers. Do this gently, by hand, feeling around in the soil, without pulling up the plants. Or wait until all the leaves have died back and then carefully pull the spuds out of the soil. But take care because they damage easily.
For really comprehensive information on growing potatoes organically, read the article from the University of California, Davis at www.vric.ucdavis.edu/veginfo/commodity/potato/organic_potatoes.pdf.
Sweet Potatoes and Yams
Sweet potatoes aren’t really potatoes, and yams aren’t really yams. Confused? Let me explain.
Although sweet potatoes (Ipomoea batatas) look a lot like potatoes, they belong to the morning glory family and are native to Central and South America. Yams are another species all together, hail from Africa, and aren’t grown in the United States. The confusion came when sweet potato growers introduced the orange-fleshed varieties and began calling them yams to distinguish them from the more familiar pale-yellow-fleshed earlier varieties.
Sweet potatoes are a warm-weather crop that requires a long, hot growing period. They like well-drained loamy or sandy soil that has been well tilled. Many sweet potato growers create raised hills to grow them in.
Start with seedlings (called slips) that have been certified as disease free. After all danger of frost has passed, plant the slips about 4 inches deep and 8 to 12 inches apart in raised rows. Feed with a liquid fertilizer, and water regularly. Sweet potatoes take from 100 to 150 days to mature, so if you live in a cooler climate, you might want to hurry things along a bit by using black plastic mulch. It raises the soil temperature substantially and also keeps the weeds down. Weeding is important in the early stages of the sweet potato’s life, but eventually the vines will sprawl all over the place and crowd out any interlopers.

Garden Guru Says
Rotate your sweet potato crop to another part of the garden every 2 years to avoid introducing or spreading diseases and pests.
Harvest the sweet potatoes before the first frost. First cut back the stems and leaves and then gently sift through the soil with a garden fork. Sweet potatoes are fragile, so if you have a small crop, do this task by hand.
Turnips and Rutabagas
Turnips and rutabagas are members of the Brassica clan, cousins of cabbages and kale. The Latin name for the turnip plant is Brassica rapa. Rutabagas go by Brassica napus. They are very similar plants, with many of the same growing requirements and preferences.
They both prefer a loose, well-prepared soil with a pH of about 5.5 to 6.8. Raised beds provide an excellent environment for turnips and rutabagas because they do best when the soil is prepared to a depth of at least 1 foot. You might also consider working in some superphosphate a few months before planting to promote strong root growth.
From the Turnip Truck
Plant turnip seeds indoors 3 or 4 weeks before the last predicted frost date. Outdoors, seeds can go in 4 to 6 weeks before that date. Place them in holes ½ inch deep and a couple inches apart. Thin to about 4 inches apart when the seedlings are a few inches tall. You can use the thinnings as greens. Successive sowings 2 weeks apart will give you a longer harvest season for both the tops and the roots.
A second planting in late summer provides a fall crop as long as you can allow about 80 days for them to grow. A late crop might actually have an improved taste, although the flavor will not get better with exposure to frost.
Turnips appreciate a layer of mulch to keep weeds down and moisture in.
You can harvest individual turnip leaves without jeopardizing the root as long as you don’t injure the crown. Harvest the roots any time after they mature. There aren’t too many varieties, but each one has a slightly different maturity time so you’ll want to consult the seed packet. Remember that smaller roots have a better flavor and more pleasing texture.
Food for Thought
According to Irish folklore, the first jack-o’lantern wasn’t carved out of a pumpkin. Some fellow named Jack put a candle in a hollowed-out turnip. Or maybe it was a Swedish turnip, a.k.a. rutabaga.
If you’re more interested in the turnip greens than the roots, add a bit more nitrogen to the soil to promote leaf growth.
Rutabagas (a.k.a. Swedish Turnips)
If you’ve read many English novels, you might have seen a mention or two of people eating swedes for dinner. These aren’t stories about cannibals! Europeans refer to what we in the United States call rutabagas as swedes, which is a shortened version of the full name, swedish turnips. Rutabagas are actually a cross between a cabbage and a turnip.
Turnips have a small, round or elongated root; rough, hairy leaves; white flesh; and a tinge of purple at the neck. Rutabagas have a large, round root; smooth, blue-green leaves; and yellow flesh.
Rutabagas are cool-weather plants with a very long growing period. They require 80 to 100 days from seed to harvest, depending on the variety and the growing conditions. Generally, rutabagas are planted in early summer for a fall harvest. They are grown from seed planted ¼ to ½ inches deep about 6 inches apart.
The flavor of rutabagas is improved when the plants have been exposed to a light frost or two. And you can leave them in the ground well into the winter if you give them a light blanket of mulch.
Better Beets
Cultivated since prehistoric times, Beta vulgares, better known as beets, were originally grown for their green tops. It was the Romans who began eating the round, red roots.
Today, there are many types of beets, including these:

Beets like well-drained, well-cultivated soil with plenty of organic matter and a neutral pH (6.0 to 6.8 is best). To help with root development, mix in some superphosphate well before planting. Beets prefer cooler weather and tend to bolt quickly if temperatures get too hot for their tastes. If you live in the South, try to find some of the heat-tolerant varieties for your garden.
Start beets from seeds right in the garden as soon as the soil can be worked in the spring. You can plant again in the late summer for a fall harvest. Plant the seeds evenly in a shallow furrow about ½ inch deep. When the new plants have a few leaves, thin the seedlings to about 2 or 4 inches apart and use the thinnings as greens for salad.
Sow beet seeds successively to extend the harvest period. Beets are ready to harvest whenever you think they’re large enough. But don’t let them get oversized, even the larger varieties, because they’ll be woody and tough.
Pokey Parsnips
Pastinaca sativa, parsnips to you non-Latin speakers, is part of the Umbelliferae family whose relatives include carrots, celery, fennel, parsley, and chervil. No one seems to be exactly sure where parsnips came from, but they were around for the ancient Romans to enjoy way back when. And in the Middle Ages, parsnips were used as a meat substitute during Lent. Although they don’t taste a bit like meat, they do have a heavy, satisfying quality that might have felt like meat to serfs. (After all, who knows what kind of meat they were used to!)
Parsnips look a little like thick, white carrots. They are another cool-weather crop that takes a long time—16 to 20 weeks—to mature.
As with all the root vegetables, parsnips prefer their growing environment to be well drained and deeply cultivated. Many gardeners grow parsnips in an area of the garden with soil that was improved the previous year. Parsnips do best with a pH of 6.5 to 7.0.
Parsnips have an aversion to too much nitrogen, so don’t add any to the soil where you plan to plant parsnips. If the soil is too rich, parsnips will produce poor-quality roots that might split, fork, or grow unappetizing hairs.
Plant seeds in the garden in early spring to early summer, and be prepared to wait a long time for the new seedlings to appear—it might take a couple weeks. In fact, parsnips are notoriously slow to germinate. Many gardeners grow radishes in among the parsnips so they know where the parsnips are. Radishes germinate quickly and are harvested well before the parsnips need the space. Plant the parsnip seeds about ¼ inch deep, 2 to 4 inches apart in rows that are from 1½ to 2 feet apart.

Prof. Price’s Pointers
Parsnips and turnips have a sweeter flavor after they’ve been through a heavy frost or two because the plants respond to the cold by storing more sugar in their roots.
Parsnips are ready to harvest when the foliage has died back. Let them stand through a few hard frosts to improve the flavor. You can also keep them in the ground over the winter if you cover them with a layer of mulch. Because parsnips are biannual plants (see Chapter 16 for an explanation), they push out new growth in the spring. If you overwinter your parsnips, harvest them before any new growth appears or they’ll lose all their flavor.
Uh, What’s Up Doc?: Carrots
Bugs Bunny’s penchant for carrots (Daucus carota) is a latter-day thing in the history of food. Carrots have been around for 5,000 years, although in colors and forms we might not recognize today. The orange thing Bugs loves was developed, legend has it, in the sixteenth century by Dutch horticulturists who wanted to honor the royal House of Orange.
After potatoes and onions, carrots are probably the most popular root vegetable in the United States, grown in gardens everywhere. As with all the root veggies, carrots like well-drained, deeply cultivated soil.
Carrot seeds are tiny, so they’re a bit of a challenge to grow. Try mixing the seed with some sand to help with the sowing. Carrots are usually planted in the spring, and sometimes again for a fall crop. Scatter the seeds over a prepared bed and cover with a light layer of soil. You’ll have to thin them, so plant far more than you think you’ll need.
Keep carrots well watered. Harvest when they’re the size you want.
The Allium Family Album
Onions, leeks, garlic, chives, and shallots are all members of the Allium family and are also distant relatives of lilies. We’ve already learned (in Chapter 10) that the bulb part of the onion and its cousins are not actually bulbs at all but are in fact a collection of modified leaves that live underground in the form of a bulb. But for our purposes here, we’ll just call them bulbs.
Crying Over Onions
Humans have been eating onions for thousands of years. And every year they seem to want more. According to the National Onion Association, 105 billion pounds of onions are produced worldwide each year. Americans, on average, eat 18.8 pounds per person annually. But that’s nothing compared to Libyans, who consume a whopping 66.8 pounds per capita each year!
Onions prefer a soil pH of 6.5 to 6.8 but tolerate a pH level as low as 5.5. As with most of the plants we’ve been looking at, onions like the soil to be well drained with plenty of organic matter to help with moisture retention and boost fertility. Onions are also heavy feeders requiring fertilizing when the young plants are a few weeks old and then again in a month or so.
The common, everyday onion (Allium cepa) is white, yellow, or red in color and varies from sweet to strong flavored. The bunches are small, with green stems, and the shape of the onion is either a round or flat globe. You can grow some such as Egyptians as annuals or perennials and use them fresh or store them for later.
Onions are grown from seeds, sets, or seedlings, generally in the early spring as soon as the soil can be worked. Scallions, which are also called green onions, can also be planted in the late summer or early fall for additional harvests.
Prof. Price’s Pointers
Plant scientists and agriculture experts call the length of the day or the number of daylight hours in the day the photoperiod. Knowing the photoperiod requirements of the plants you want to grow helps you determine when and what to plant.
Scallions or green onions can be grown as simply immature white onions or from seeds or seedlings specifically designated as scallions. Burpee, for example, offers a variety called Evergreen Long White Bunching Scallion that takes 60 to 120 days to mature from seed sown in spring or summer for harvest in fall through the winter.
Plant onion seeds about ½ inch deep, or place sets about 2 inches below the soil. Allow 3 to 5 inches between plants, depending on the variety you’re planting.
You can harvest onions at almost any time after the bulb has formed to use fresh. Onions to be harvested for storage should be left in the ground until the leaves have dried up. Then they must be “cured” or dried. Get instructions for curing onions from your county extension office.
Great Garlic
If you have any experience with Italian, French, Mexican, or Chinese cooking, you’ve worked with garlic. It originated somewhere in Asia, but people from all over the world claim it as their own.
The biggest difference between garlic and its onion cousins is that the bulb (which, as we know isn’t really a bulb) is actually a grouping of cloves that fit together forming the shape we recognize so easily. The other difference is in the leaves. The leaves of onions, leeks, scallions, chives, and shallots are hollow, like straws. But the garlic leaf is flat.
There are three basic kinds of garlic:
• Common or softneck (Allium sativum)
• Stiffneck or hardneck (Allium sativum ophioscorodon)
• Elephant (Allium ampeloprasum)
As with onions, garlic is a heavy feeder and appreciates a rich soil enhanced with organic matter and fertilizer. Plant seed cloves in early spring in northern zones or as a fall or winter crop where the weather is warmer. Plant the small cloves ½ to 1 inch deep and 3 to 5 inches apart.
Softneck garlic will grow in many climates, but the hardneck varieties are fussier. They don’t like hot weather and do best where it is cool.
Elephant garlic is an extra large type. An individual clove can be as large as an entire head of it’s relatives, although the flavor is mild and almost sweet.
Harvest softneck garlic when the green tops have dried up and fallen off. Hardneck garlic, which is often preferred by chefs and gourmet cooks, produces a curly green stem that should be cut before it straightens and forms a flower at the end. This helps divert the plant’s energy from flower formation to bulb growth. The stems, called scapes, are an ephemeral treat—add them raw to salads or use them in stir-fries. Some people even make a garlic scape relish.
Sowing Shallots
These elegant little members of the onion clan are de rigueur in French cuisine and add a delicate flavor to all kinds of dishes. They aren’t grown all that often in the home garden, but they should be—they aren’t particularly difficult and don’t take up much space.
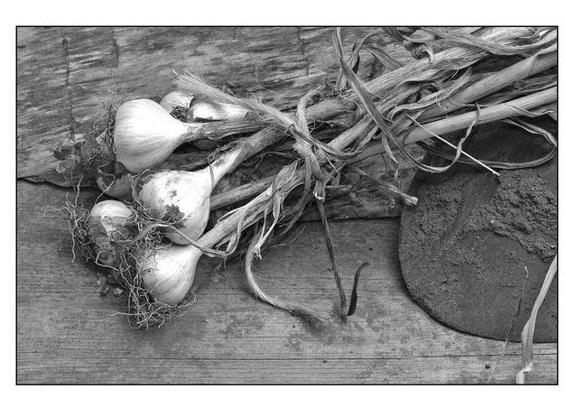
The long stems of hardneck garlic are often braided so the garlic can be hung to dry. Store fresh garlic that hasn’t yet dried in the refrigerator.
Shallots (Allium ascalonicum) have the same basic requirements as other onions. New plants are grown from sets and planted as early as the soil can be worked in cool zones or as a fall or winter crop in warm parts of the country. Plant the sets pointy end up about ½ to 1 inch deep and 3 to 5 inches apart.
Harvest shallots when the foliage begins to die back.
Leeks (a.k.a. Poor Man’s Asparagus)
The leek (Allium porrum) is the national symbol of Wales, but in France, it’s known as the poor man’s asparagus. Although still not an everyday vegetable in the United States, leeks’ popularity is growing as Americans become more adventuresome in their cooking and eating.
Leeks look like scallions on steroids. They have thick stems that are white at the bulb end and become increasingly green toward the leaf part. The bulb never actually develops but stays about the same width as the rest of the stem. The stem must be blanched before it will turn white.
Leeks are generally grown from seed, which can be planted indoors about 10 to 14 weeks before they’re set out in early spring.
To plant the seedlings, dig a narrow trench about 6 inches wide and 1 foot deep. Place each leek transplant upright in the trench, spacing them about 4 inches apart, and add just enough soil to hold them upright. Water thoroughly, but don’t fill in the trench. As the leeks grow, add more soil so the stem is nearly covered. Keep on filling the trench as the plants grow, eventually hilling the soil up so just a couple inches of green stem show.
Allow anywhere from 12 to 15 weeks for leeks to mature for harvest. Try growing a few extra plants to harvest early as baby leeks.
The Least You Need to Know
• Don’t allow young potato tubers to be exposed to the sun. If they are, and they turn green, throw them out.
• Harvest rutabagas after they’ve experienced a light frost or two for enhanced flavor.
• Don’t give parsnips a very rich soil.